Are Your Forms Built?
First, check that we've set up your Application Form for you (and the Reference Form if you use references in your application process). If you need your Application Form and Reference Forms set up, get in touch with us and we'll get it done for you ASAP
Go To Your Dashboard
Next:
Login to your Admin dashboard.

Access Your Toolkit - Click Invite
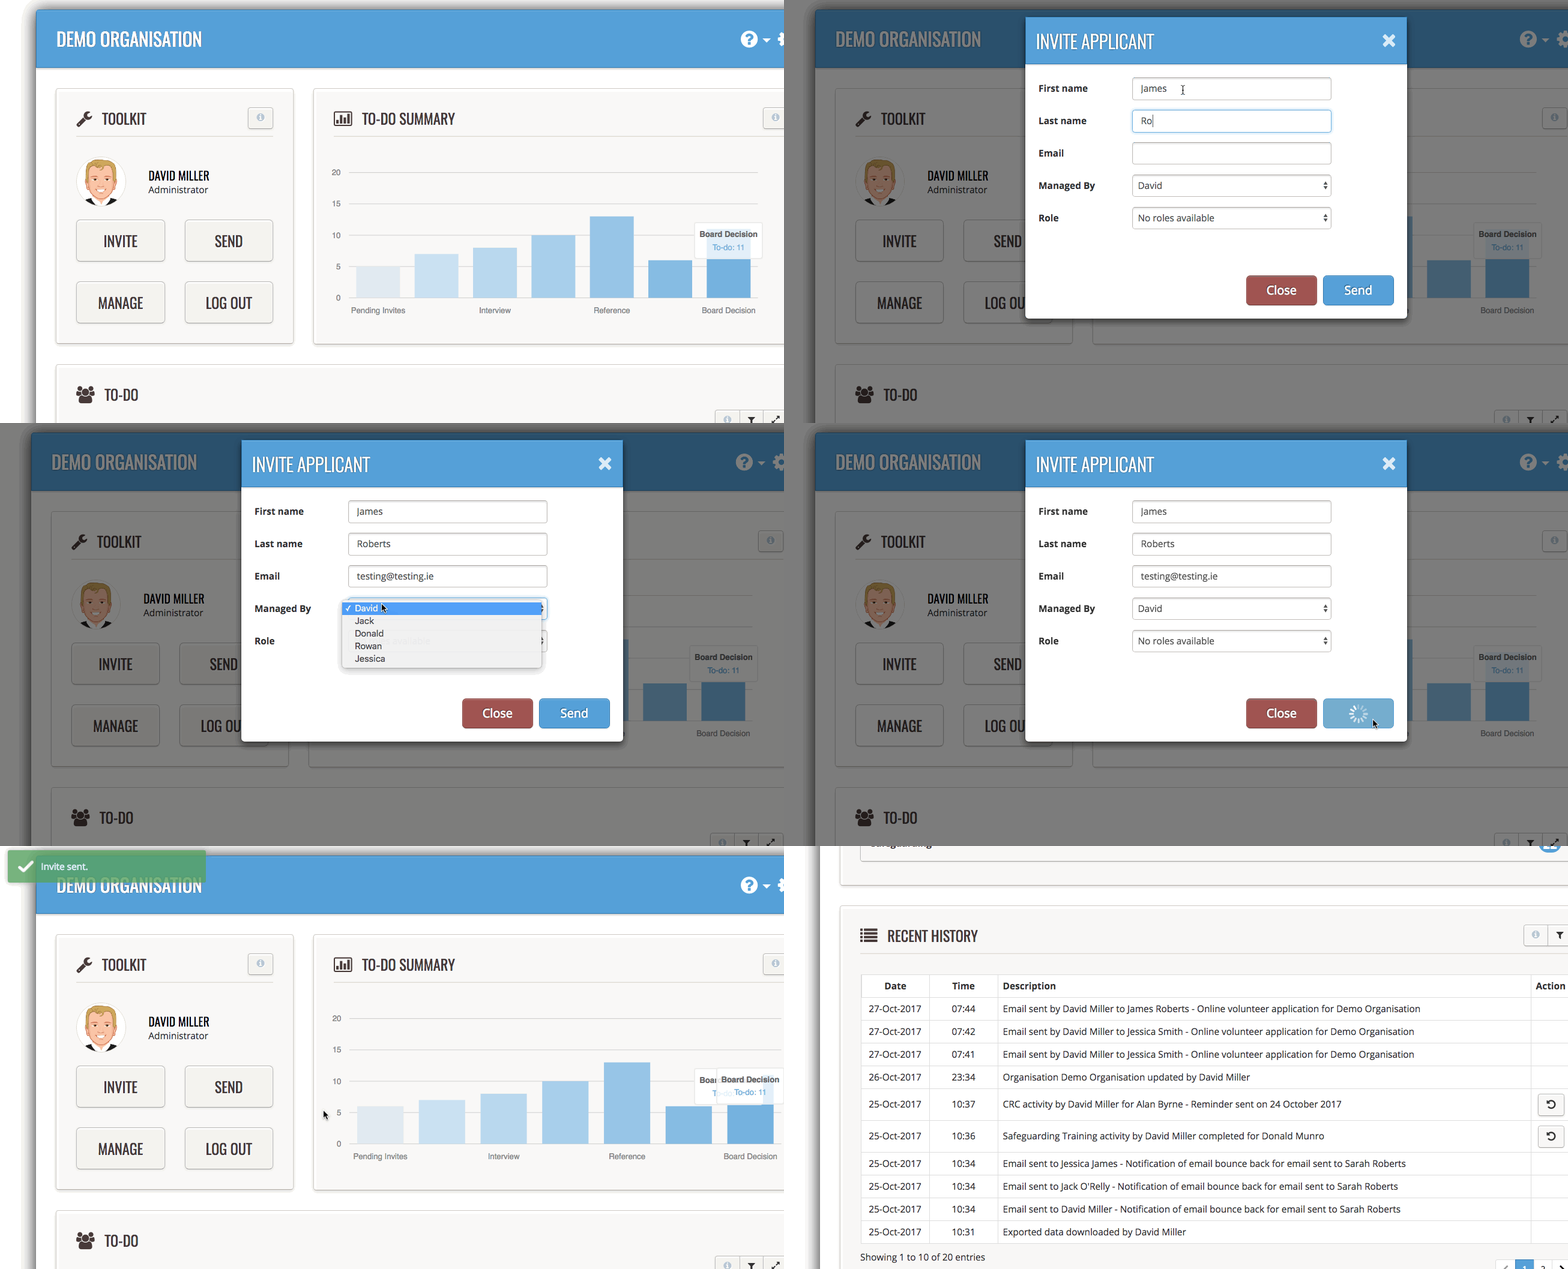
In the top left of your screen you'll see your Toolbox. Click the 'INVITE' button.

You will see this INVITE APPLICANT box appear:
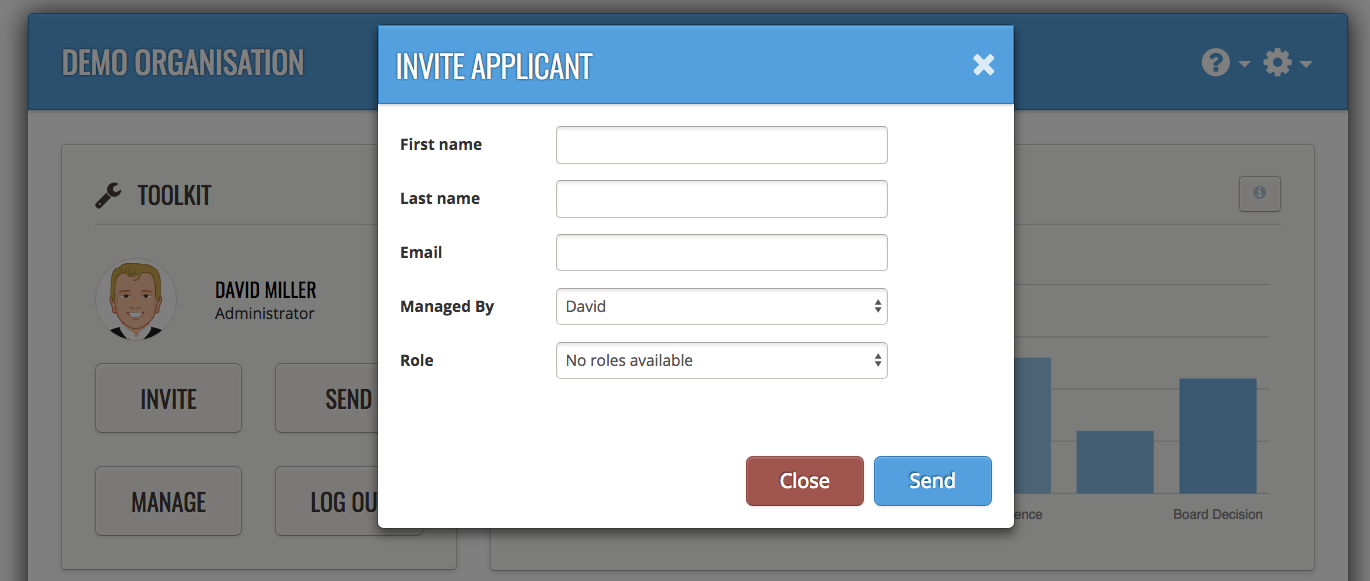
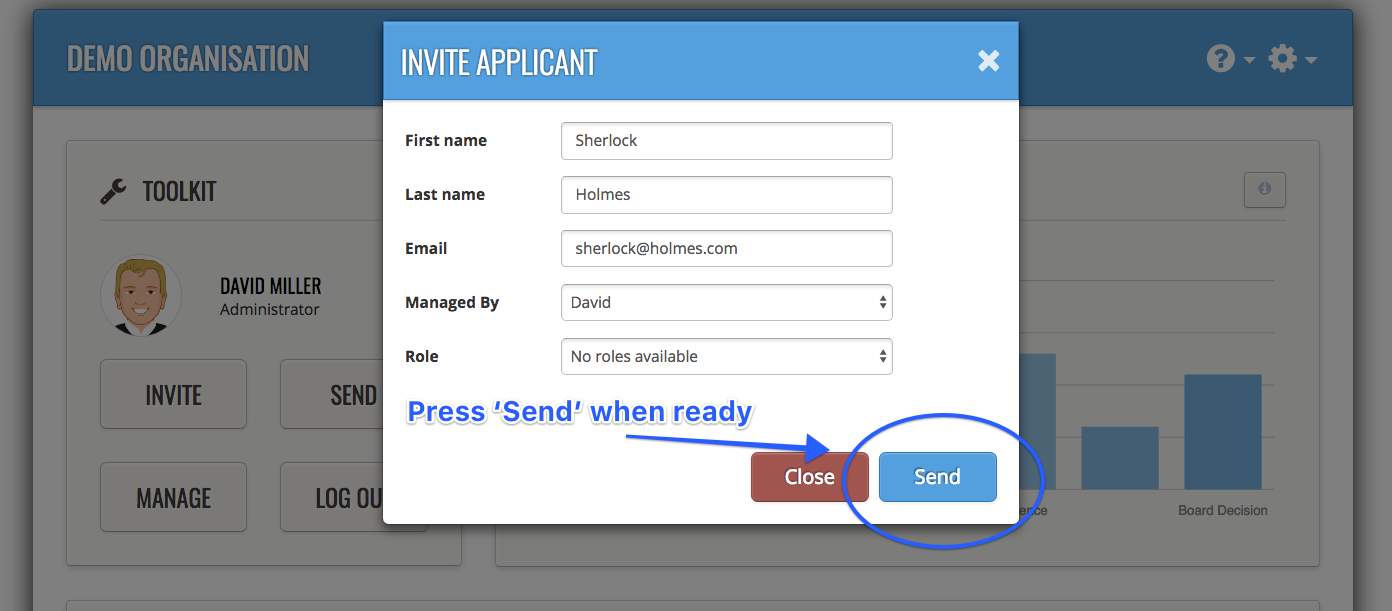
Type the first name, last name and email address of the person to whom you are sending the volunteer application online:
Managed By
We make it easy for you to assign to a particular administrator the responsibility for the recruitment of a particular applicant/volunteer.
When you send an Email Invite, the 'Managed By' field automatically defaults to the name of the person issuing the Email Invite.
If you want to assign the responsibility to someone other than yourself (as you're the logged-in administrator), simply click the drop-down arrows where your name appears, and select the name of your co-administrator (assuming you have one) to whom you want to assign the responsibility going forward.
Role
We've introduced the ability for you to create 'Roles' for your volunteers, and to assign them (for management purposes) at the point of sending the Email Invite.
You can create a 'Role' that is specific to your organisation. Click here to see how to create a 'Role'.
Toaster Message Confirmation

History Record Generated
Scroll down your Admin dashboard. The most recent item in your History list will note the date and time and email that you've just sent.

Courtesy Call
The final thing to do, if you know the person who's expressed an interest in applying to you, is perhaps to give them a courtesy call to be on the lookout for the volunteer email invite you've just sent to them.
People check their emails with different frequencies (some regularly, others not so often).
If you call them and tell them to look for an email from [email protected], and to make sure that they check their spam/trash folder in case their email filter's diverted it there, then you're likely to get the quickest turnaround possible!
Pending Invites - To Do
Pending Invites in your To Do section is where a record is kept of each and every Email Invite you've sent out. As the name suggests, this section is for Email Invites that have been issued, but for which the person to whom you sent the email has not completed the link in the application form on the email. That's why it's still 'pending' completion.
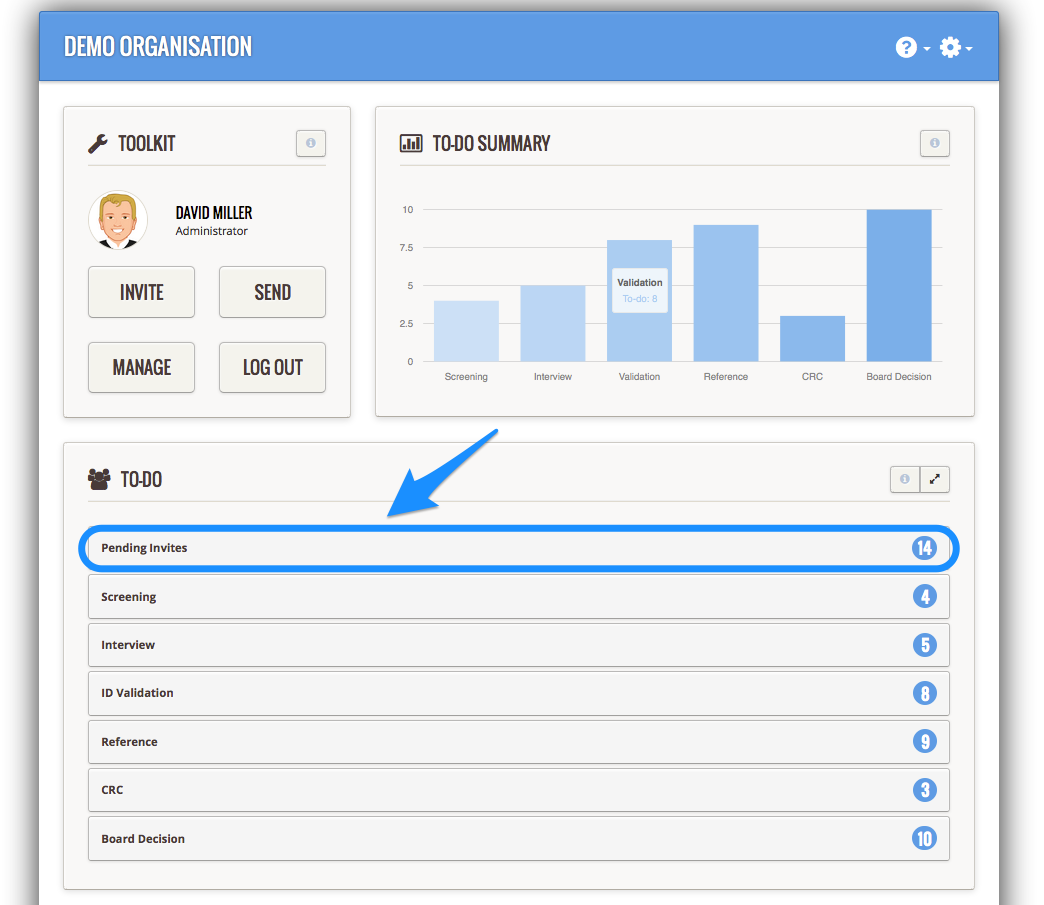
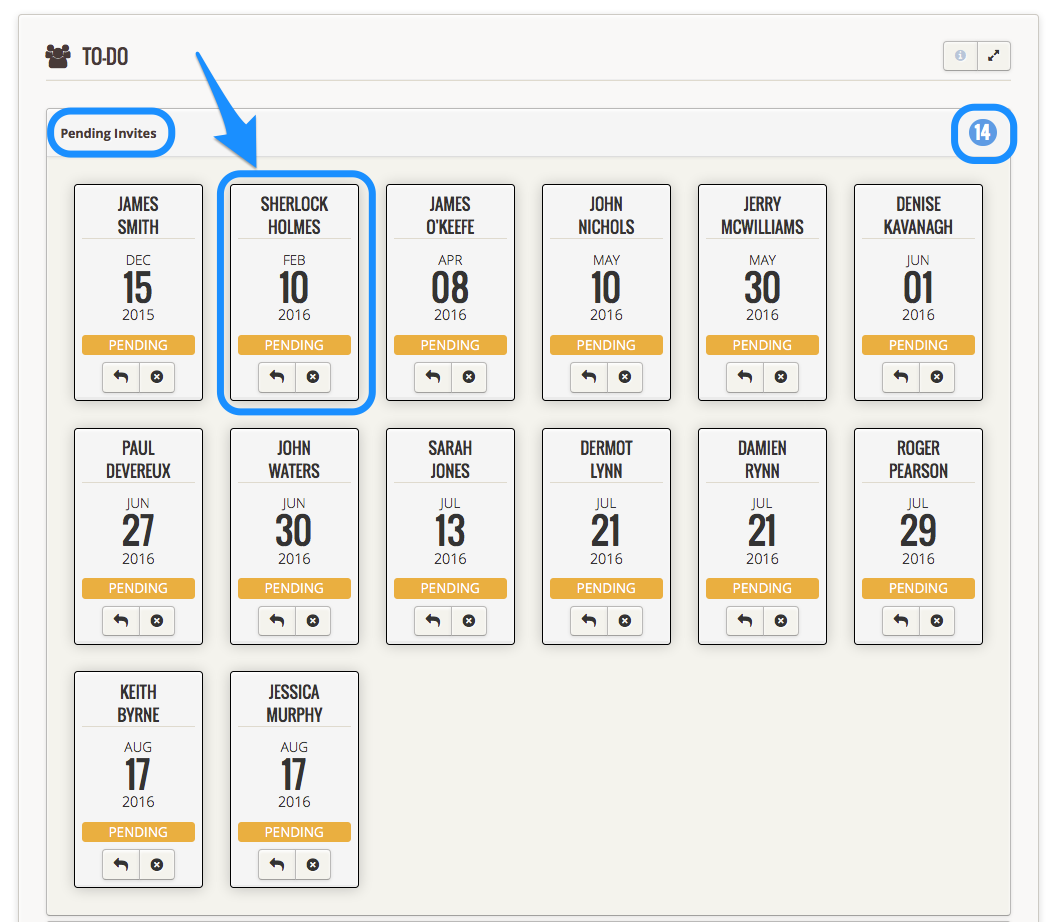
An Applicant's Pending Invite Card
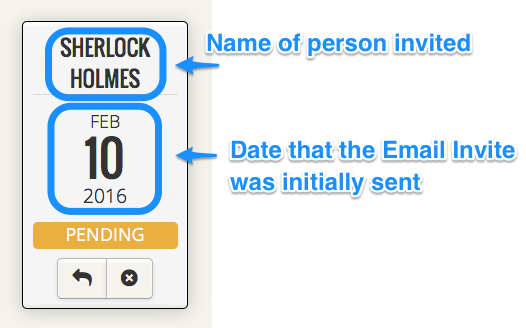
Status, Resending, Revoking An Email Invite
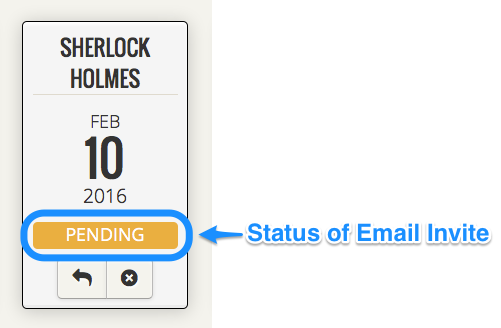
How To Resend A Pending Email Invite
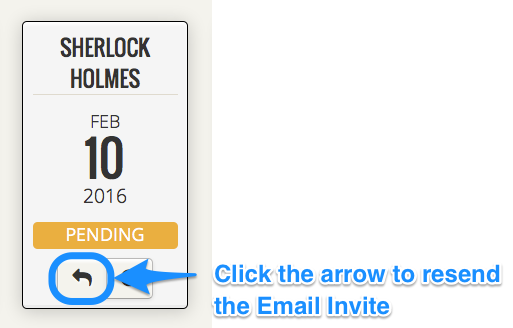
How to Automate the Resending of a Pending Email Invite
A great feature is the ability to automate the re-sending of the Email Invite.
Simply tell the system how frequently you want it resent; and how many times in total.


Check out our video for a 2 minute walk-through:
- Go to Org Settings
- Scroll down to the Email Auto-Resending Frequency panel
- If you haven't previously enabled it, the white checkbox will be unticked, and the days panels x 2 will be greyed out
- To enable, check the check box, then select how frequently you want it resent, and how many times in total you want it resent.
- Click Save at the bottom of the form, check for the toaster message in the top left or right of your screen to confirm saved ok; and then check the history records on the home page of the app
- Now to test, simply send an Email Invite using the Invite button, and it should automatically resend in line with the frequency and maximum number of times you specified (for testing we recommend set it to resend daily for e.g. 2 days)
How to Revoke (Delete) a Pending Email Invite
From time to time you may issue an Email Invite to someone who has expressed an interest in volunteering in your organisation.
However, you may decide that you want for some reason (length of time since invite issued; bounce-back with email address used etc) to revoke that particular invite (and possibly re-issue a fresh Email Invite using an alternate email address).
The simplest way if you need to revoke / terminate a Pending Invite is to press the "X" button in the bottom right hand corner of the applicant's card.
To do this:
- Locate the Pending Invites bar in your To Do section on your organisation dashboard
- Locate the Pending Invite card for the applicant whose invite you intend to revoke
- Click the 'X' icon on the card
- Confirm you want to revoke the invite by pressing 'OK' on the on-screen notification
- A green message fades in and out to confirm the action, and a record of the action taken is automatically generated in your History section
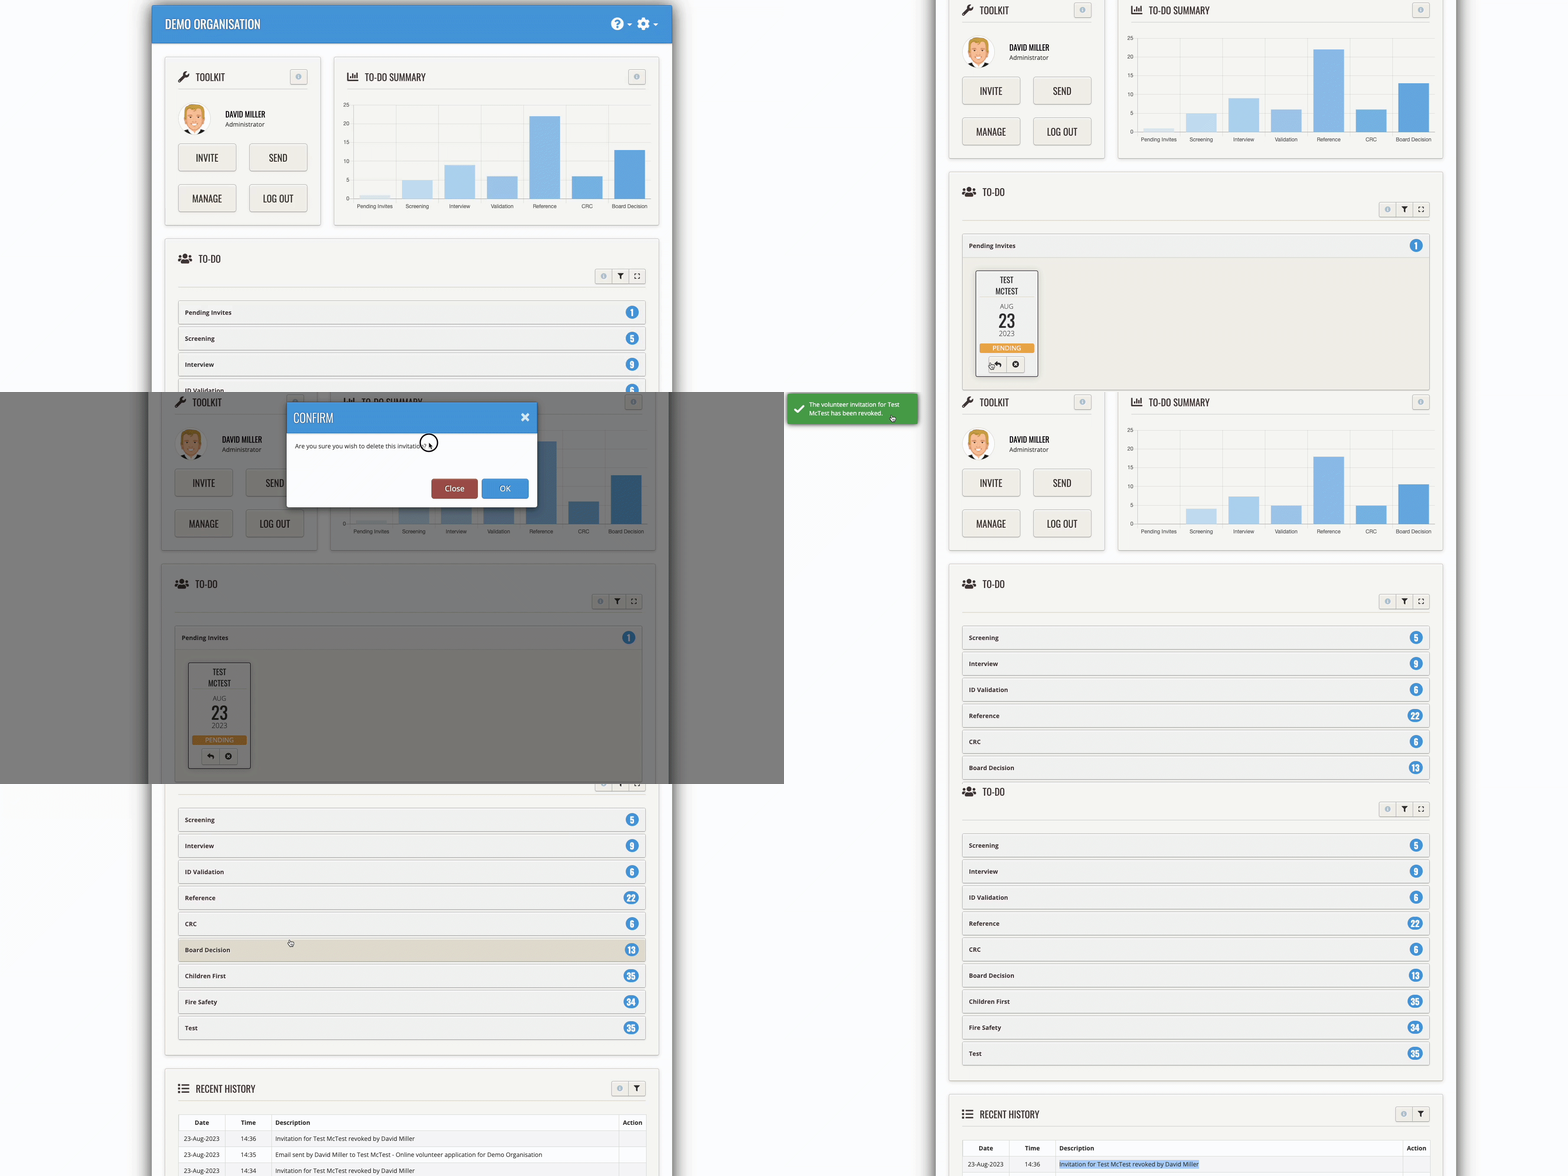
A green 'toaster' alert message pops up to confirm successfully revoked.
This 'revokes' - deletes - the invitation and records the fact that you've revoked the invite, in your History section.

Summary - What To Do When an "Email Invite" Bounces Back
(Remember, an "Email Invite" is the email entitled “Online volunteer application for [Your Organisation's Name]”).
- If an Email Invite ever bounces, the organisation's administrator has to get the person who’s expressed an interest in volunteering, to give the administrator a new correct email address.
- Next, the administrator has to DELETE the “Pending Invite” that is associated to what the administrator now knows to be the ‘incorrect’ email address (i.e. the email that bounced).
Deleting the “Pending Invite” permanently deletes the person’s record from the administrator’s system (as well as permanently deleting their name too).
This way, once the adminstrator has their correct email address, the administrator is now free and able to issue a – new – Email Invite to the person who’s expressed an interest in volunteering, this time using the email address that they’ve confirmed to the administrator is correctly spelled and works.
What happens if an administrator does not delete the Pending Invite?
If an administrator forgets to delete the Pending Invite associated with the bounced email address, and then issues a NEW Email Invite – using the same name of the person whose initial Email Invite had a bounce back – then they’ll be creating ‘duplicate’ records in their Complyfile under that person’s name. This will cause confusion.
How so? In the Pending Invites section they’ll have two ‘cards’ in the name of the same person, looking a bit like this (below).
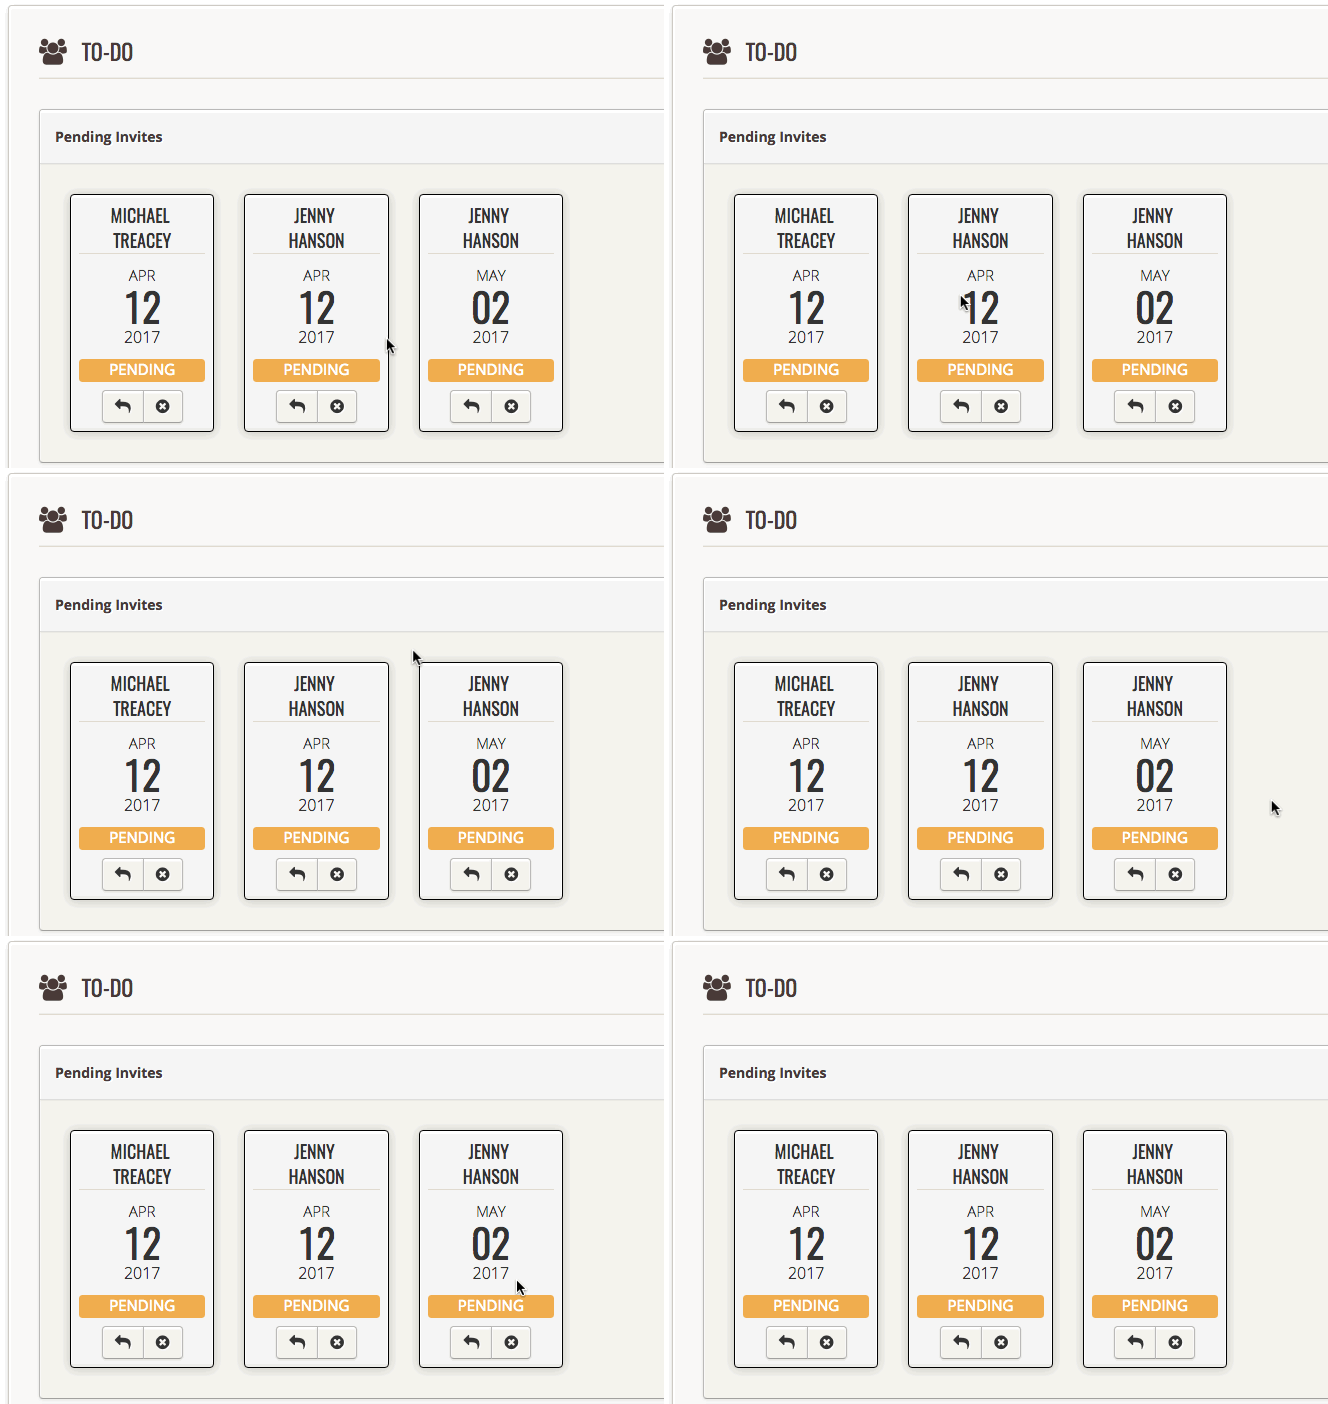
- The first Email Invite was issued to a person called Jenny on 12 April. This Email Invite ‘bounced back’ due to a typo.
- However, instead of deleting the Pending Invite, and re-issuing to the correct email address, the administrator forgot to delete the original Email Invite, and simply issued a new Email Invite.
This has the unintended effect of creating two records for a person called ‘Jenny Hanson’ in the organisation’s Complyfile.
This can give rise to confusion. For example, if an administrator wants to send an email (not an Email Invite) to Jenny Hanson, the administator’s Complyfile will still have details of the incorrect email address in the system, and an administrator may end up unwittingly emailing the email that has already bounced back.
How to avoid duplicate records
Follow the steps set out here, the most important point of which - to avoid a duplication of records – is to delete the Pending Invite for the person whose Email Invite bounced back.