Document retention functionality is available to enterprise customers]
Why bother with document retention?
- To help your Administrators in time savings.
- It also builds senior management and board confidence. They want to know they're complying with GDPR.
- Under GDPR, it's important you hold on to documents for the right period of time. And then get rid of them when you no longer need to keep them.
Do you want even more control over documents you upload to your Complyfile?
If the answer's 'yes', then read on!
- You enable document retention functionality in your Complyfile
- You apply your offline Retention Policy to a Document Type in your Complyfile. (E.g. retain Vetting Letters for 365 days, then schedule for Auto-Archiving and subsequent Auto-Deletion).
- You upload a document (e.g. a Vetting Letter) to your Complyfile
- Give that document the correct Document Type. That Document Type should have your Retention Policy against it (e.g. 'Vetting Letters').
- Your Complyfile knows to schedule this document to Auto-Archive in [X] days.
- Your Complyfile knows to Auto-Delete this document after [Y] days in the Archive.
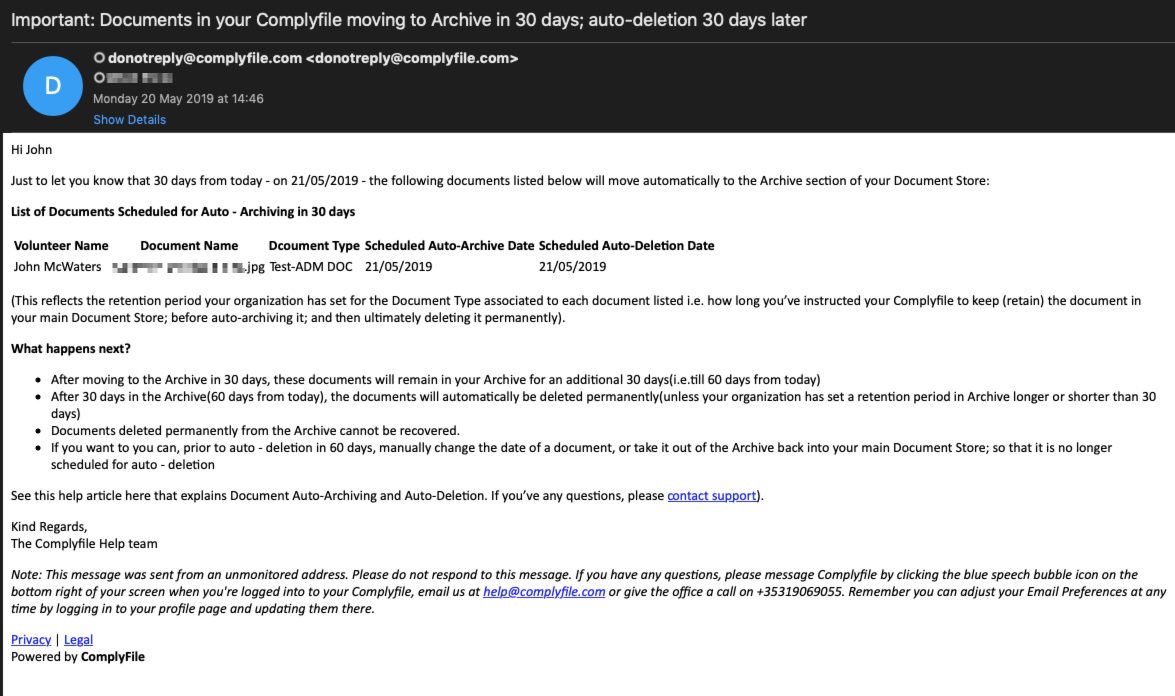
- Organisation Administrators of your Complyfile get an email notification. They get this 30 days before the 365 days are up. Why? To remind you that the Vetting Letter will Auto-Archive after a total of 365 days since you uploaded it.
- 365 days after you uploaded the Vetting Letter, your document is Auto-Archived.
- [X] days later, the Vetting Letter is Auto-Deleted.
- History Records are automatically created along the way.
What's relevant in the General Data Protection Regulation (GDPR)?
- Article 17: Right to erasure (‘right to be forgotten’)
- Article 24: Responsibility of the controller (demonstrating GDPR technical compliance)
- Article 25: Data protection by design and default
- Article 30: Records of processing activities
How do you benefit by deploying Data Retention functionality?
- Comply proactively with regulations and internal policies. Those regulations and policies make you keep content for a minimum period of time
- Reduce your risk in the event of litigation or a security breach. How? By permanently deleting old content that you’re no longer required to keep.
- Help your organization to share knowledge effectively and be more agile. How? By ensuring that your team work only with content that’s current and relevant to them.
- Retaining content so that it can’t be permanently deleted before the end of the retention period.
- Deleting content permanently at the end of the retention period.
-
Decide proactively whether to
- retain content
- delete content, or
- both – retain and then delete the content.
- Apply a single policy to the entire organization or just specific users.
- Apply a policy to all content or just content meeting certain conditions
Retaining content for a specific period of time
Does your organisation have a Document Retention Policy?
No - or not sure
Yes
How does it work?
For those interested, there are 3 main jobs that your Complyfile will do each night:
- Check each document to see if we should Auto-Archive it
- Check each document to see if we should Auto-Delete it
- Check to see which documents we should reference in an email to Administrators 30 day before Auto-Archiving
Auto-Archiving
As you're automatically moving a document to your Archive, we call this Auto-Archiving.
- You simply set a period of 365 days as the period to hold the document.
- On the 365th day, the document will automatically move to your Archive.
What happens when a document moves to the Archive?
What happens when a document moves to the Archive?
Well, it sits there for the length of time you want documents to be in your Archive, before its automatic deletion. (Not quite 'gathering dust', but you get the idea).
What changes in the document uploader?
Document Uploader - New Fields
You will see new fields in the Document Uploader. They appear when you turn on Auto-Archiving and Auto-Deletion.
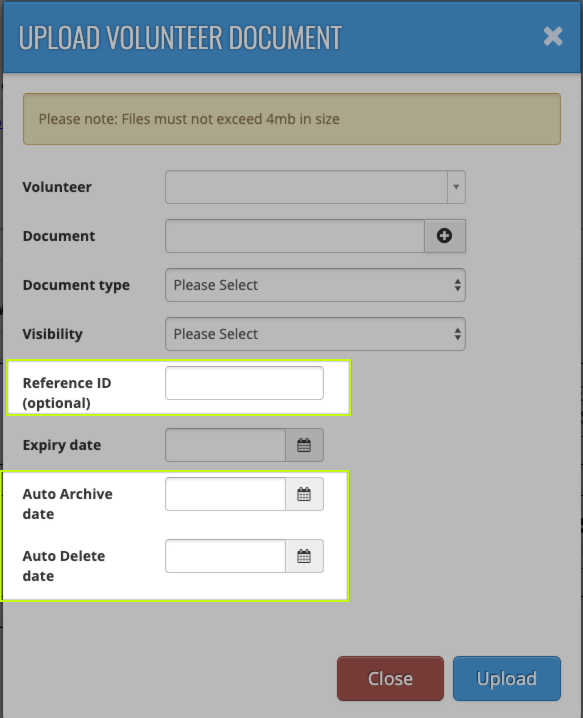 Reference ID
This a free text field. You can type any reference number into it.
This is useful to capture information relating to a third party system.
E.g. the National Vetting Bureau reference number: Vetting Request ABC001-20190426-00765:

This is great from a data protection point of view.
Why? It means that when you delete a document, you can still keep a Reference ID for that document.
So you can:
- trace the document back to its source with another organisation
- without keeping the document any longer than is necessary.
This balances competing interests:
- of deleting documents
- while being able to identify where it came from if there's a query in the future.
This Reference ID will also appear in a column in: Reports > Data Export > Volunteer > Documents > Excel file.
 How long does a document sit in the Archive?
Whatever period you go for, applies to all Document Types in your Archive. You cannot customise by Document Type how long a document is kept in your Archive before Auto-Deletion.
Auto-Deletion
What happens at the end of a document's Archive Shelf Life?
The document is automatically and permanently deleted from your system.
Important note: This is a permanent non-recoverable action.
Can we move a document back out of the Archive and into the main Document Store?
- Go to your Document Store > Archived Documents.
- Locate the document to restore back out of the Archive and into your Document Store.
- Click the back arrow, which restores the document to your Document Store.
- You'll notice that the Auto-Archive Date and Auto-Deletion Date have been cleared from the document
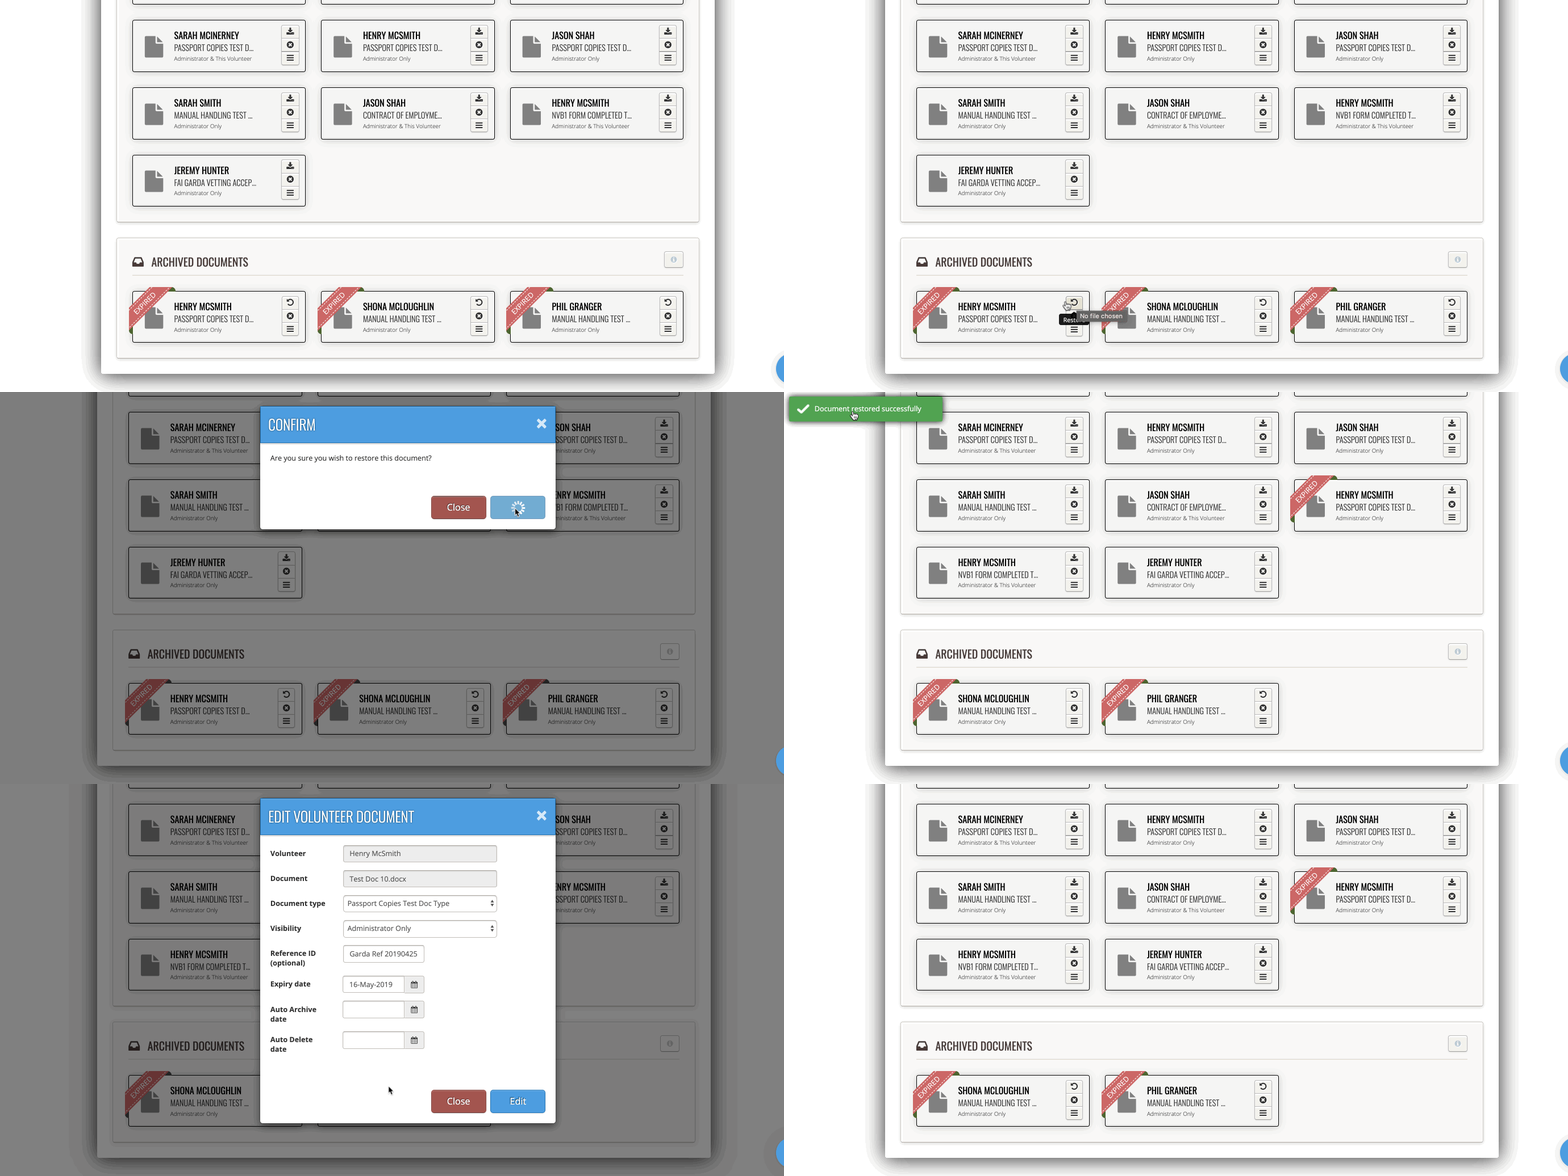
You should also see the History Record:

How do we enable the functionality?
- Scroll down to Document Types
-
Check the empty box 'Enable Auto-Archiving & Auto-Deletion of Documents'
 to enable the Auto-Archiving and Auto-Deletion functionality.
- Next, type into the empty box the number of days you want to hold a document in your Archive. After this period of time in the Archive, the document deletes automatically.
- Important note: This is the period of time to hold any document in your Archive. You might want to say that you hold all documents in your Archive for 30 days before they go to Auto-Deletion. So you would:
- type 30 into the field
- click update, and
- press Save.
- Check your changes saved correctly with the toaster messages and history records:

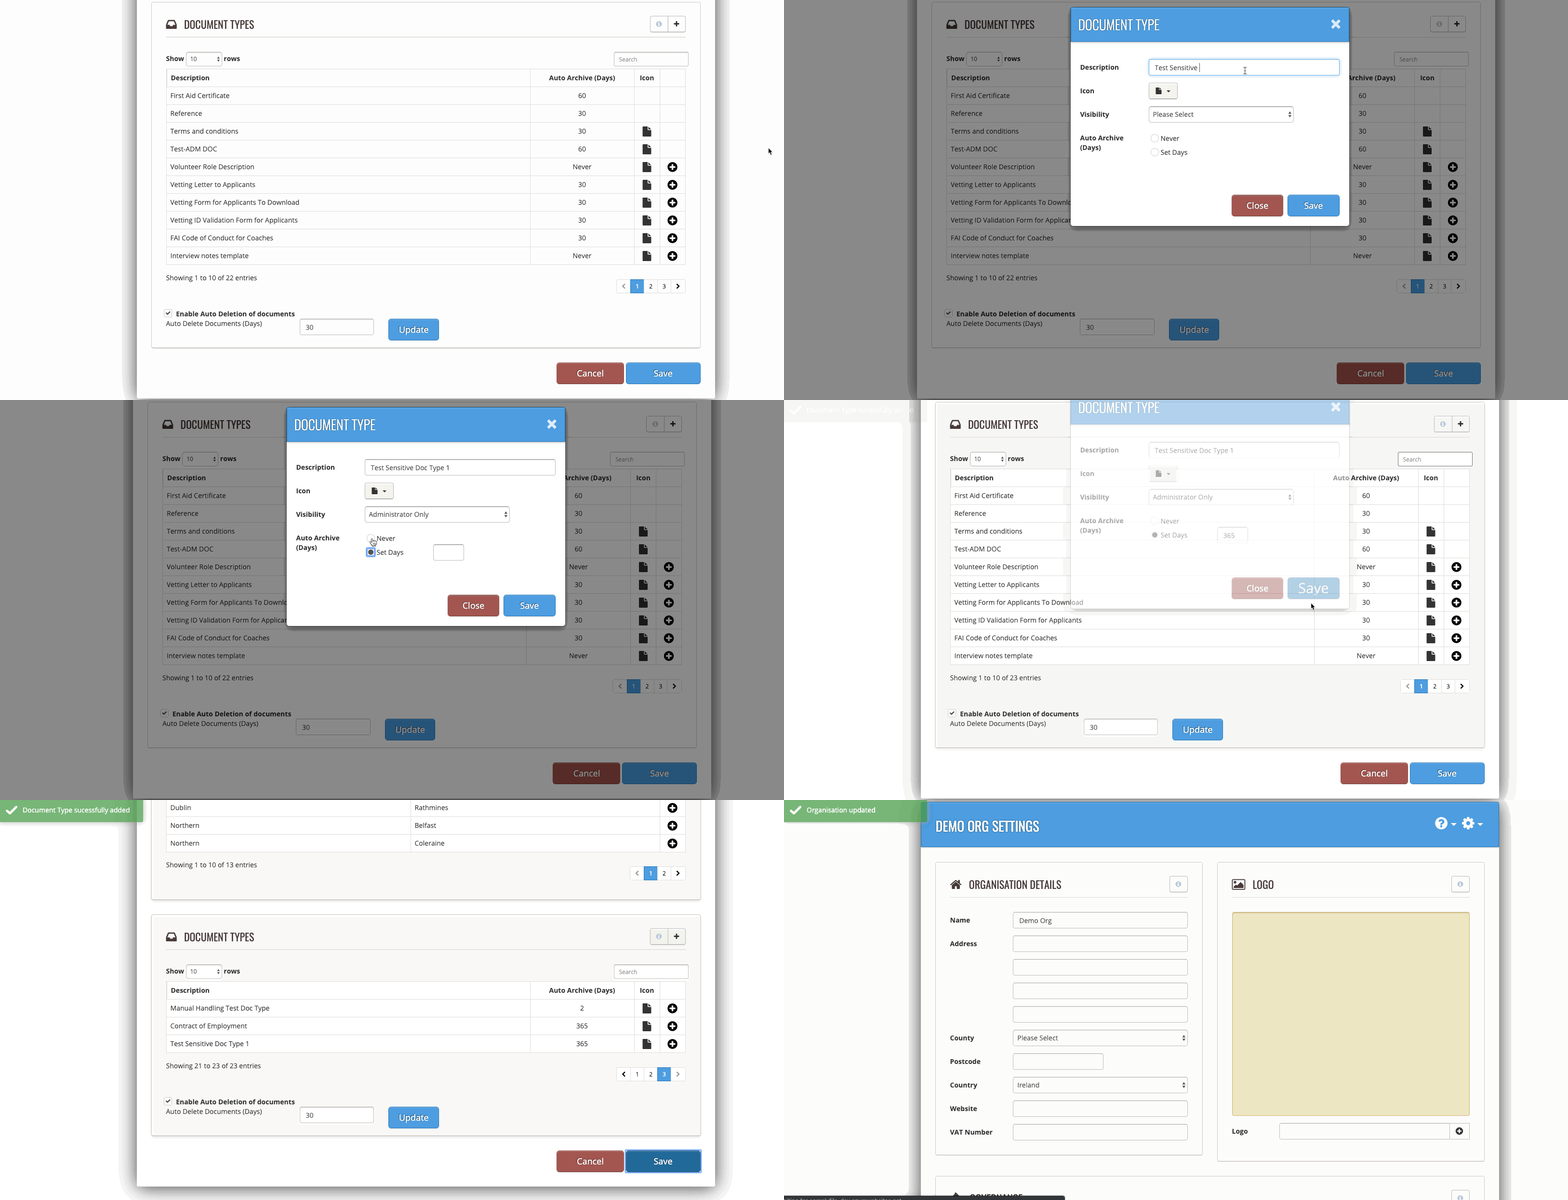
Setting up a test Document Type with Auto-Archive Days
Create a new Document Type. Click here for a refresher help article on how to do so.
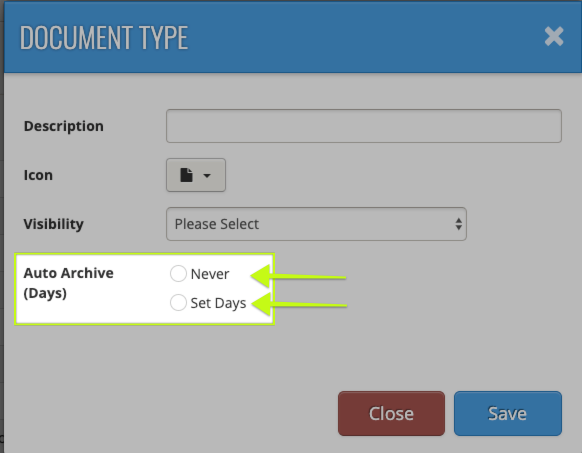
- That says 'Never'.
- That says 'Auto-Archive (Days)'.
What happens if you select Never?
This means a document with this Document Type will never go to the Archive. It will always remain in your Document Store. Documents have 'Never' as their default setting.
What happens if you select 'Auto-Archive (Days)'?
This requires you to confirm the number of days after which the document should move to the Archive. This period starts from the date of Uploading.
After [X] days have passed (where [X] = the days after which to move into Archive), the document will move automatically to your Archive (Auto-Archive).
A History Record will record the fact it happened.
Can you manually over-ride the Auto-Archive date?
Yes, you can.
The box that appears that allows you to set a date is called the 'date picker'.
Where a document has an Auto-Archive date assigned to it, this date will pre-populate in the Auto-Archive Date field of the Document Uploader.
To over-ride this date (either extending it out, or shortening it), simply select the new date and save.
- We'll open it up.
- Click the Auto-Archive Date.
- Change it to a new date.
- And then do the same for the Auto-Delete Date
- Click 'Edit' to save
- Check the History Record
How do you know when a document is going to the Archive?

What's the purpose of the email?
Can you opt out or back in to getting the email notification?
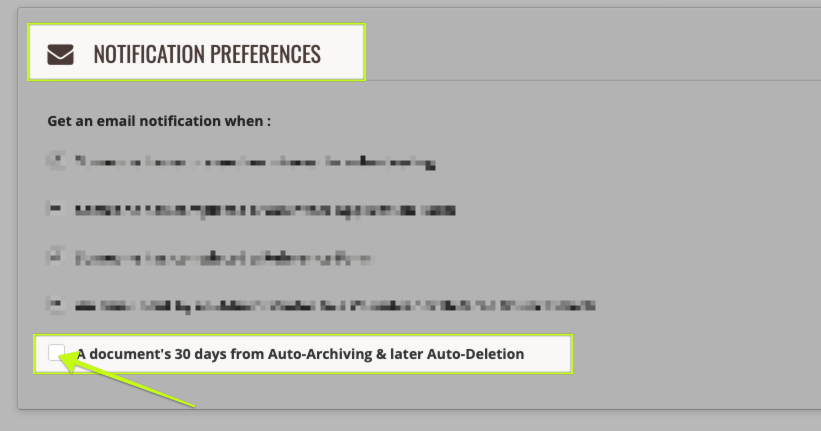
Yes, in your Notification Preferences section of your profile page.
- Leave the checkbox empty if you do not want to get an email notification.
- Check/tick the unchecked box if you do want to get an email notification.
- Note that at least one Administrator must receive the email notification.
History Records
Opting out and opting in creates History Records. This happens on the Administrator's profile page, and also on the home page of the application:

Will you get another reminder email before Auto-Deletion?
What happens if you manually delete a document that has Auto-Archive and Auto-Delete settings applied to it?
The system recognises your instructions, and immediately bypasses the previously applied Auto-Archive date for the document. The document moves to the Archive. It creates a History Record. It then Auto-Deletes automatically after the period of days that your documents sit in the Archive.
How to test the Auto-Archiving and Auto-Deletion functionality
We look here at:
- how to test auto-archiving, and getting the 30-Day Archiving Alert email
- how to test auto-deletion
Testing Auto-Archiving & Receipt of the Auto-Archive Alert email
- Switch on Auto-Archiving and Auto-Deletion (see above).
- Create two new test Document Types. E.g. 'Sensitive Test Document Type 1' and 'Sensitive Test Document Type 2'. Or 'Testing 30-Day Auto-Archiving'.
- In the first new Document Type, set the Auto-Archive Period as 30 days. So that the document is Auto-Archived after 30 days. Setting it as 30 days (for test purposes) means you'll see the 30-Day Auto-Archive email alert tonight.
- Next, upload a test document. e.g. a blank word document called 'Test Doc 1'.
- Select 'Sensitive Test Document Type 1' as the Document Type.
- The Auto-Archive Date should display as today's date (the date of upload) plus 30 days.
- Check that your Admins have opted to get the Email Notification
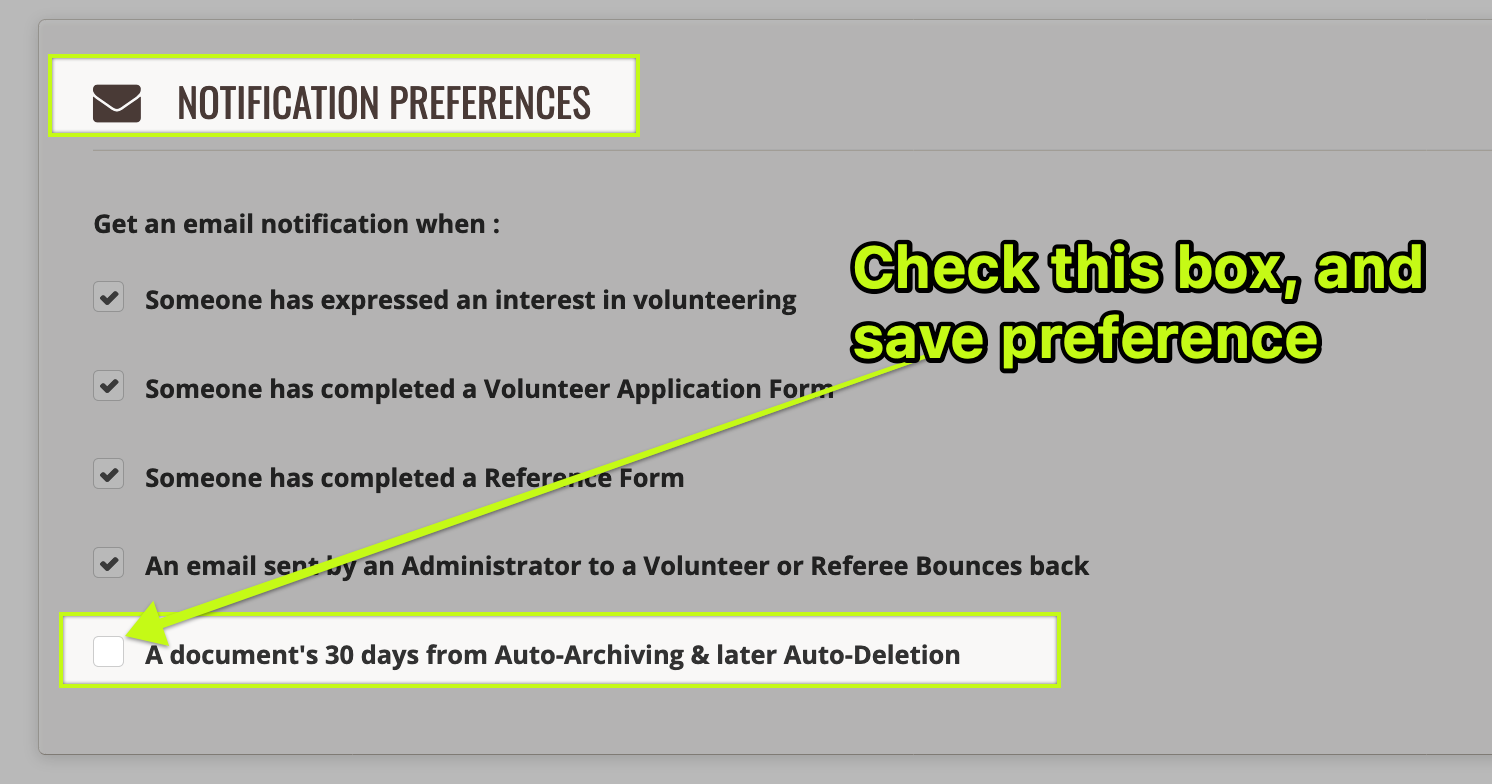
(The system checks which documents to Auto-Archive in 30 days' time. It will recognise that the test document is one of these documents. And the system sends an email to the relevant Administrators, to let them know).
Testing Auto-Deletion (without waiting [X] Days)
- In the second new Document Type, set the Auto-Archive Period as 1 day. So that the document is Auto-Archived after 1 day (or other amount of days of your choice).
- Remember that you set the number of days after which period documents Auto-Delete. To test this process you want to accelerate that waiting time.
- So, manually over-ride the Auto-Delete Date. You could set it for the next day immediately following. I.e. Auto-Archive after 1 day; then Auto-Delete 1 day later.
- Next, upload a test document. Select 'Sensitive Test Document Type 2' as the Document Type.
Note: you can also schedule it so that the document auto-deletes the same date that it auto-archives. Simply over-ride the Auto-Deletion date in the date-picker, and choose the same date as it's due to Auto-Archive. The system will Auto-Archive the document, and then a moment later, Auto-Delete it.

