The first thing to do is to create a valid import CSV file.
(What's a CSV file? If you're not sure, click here to learn the difference beween an Excel file and a CSV file).
Why do I need to import any data using a CSV file (or any file for that matter)?
If you have volunteers who you have already recruited (prior to your adoption of the Complyfile software), you may decide to create a secure private profile page for these persons within your Complyfile, against which you can upload their paper volunteer records.
If you don't intend importing data for existing volunteers, you can skip this help article.
If you do intend to import data for your existing volunteers, please read on.
Prepare your import file using your Complyfile 'Volunteer Upload CSV file'
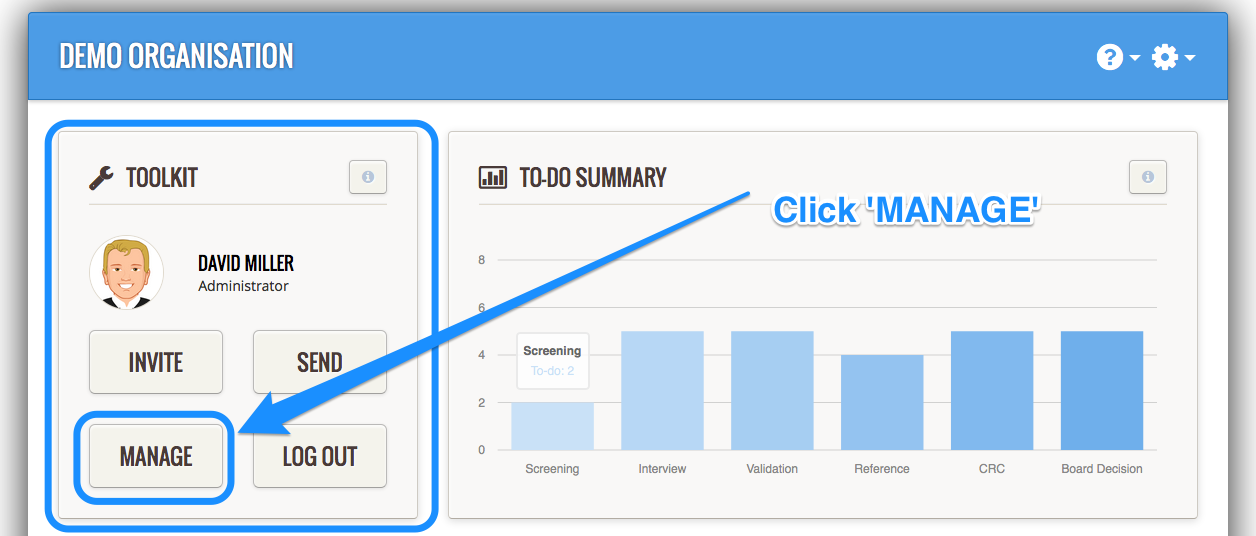
Log in to your Complyfile Admin Dashboard.
Go to your Toolkit.
Click the Manage button.
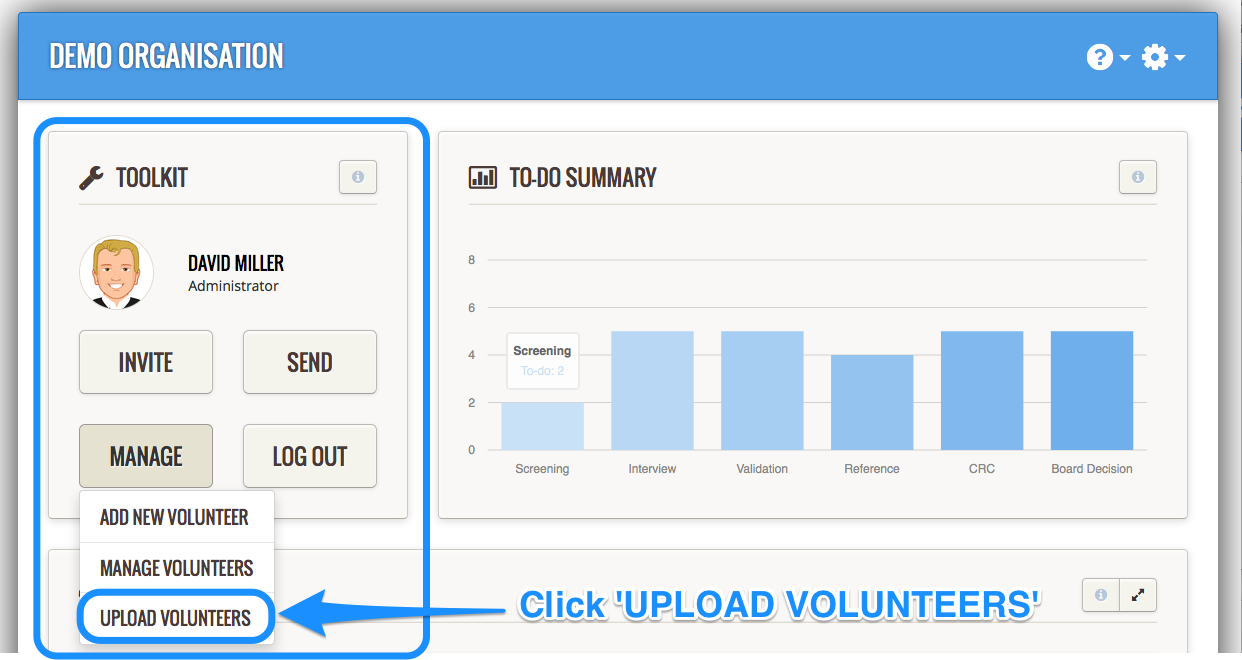
 Click Upload Volunteers in the dropdown that appears under the Manage button.
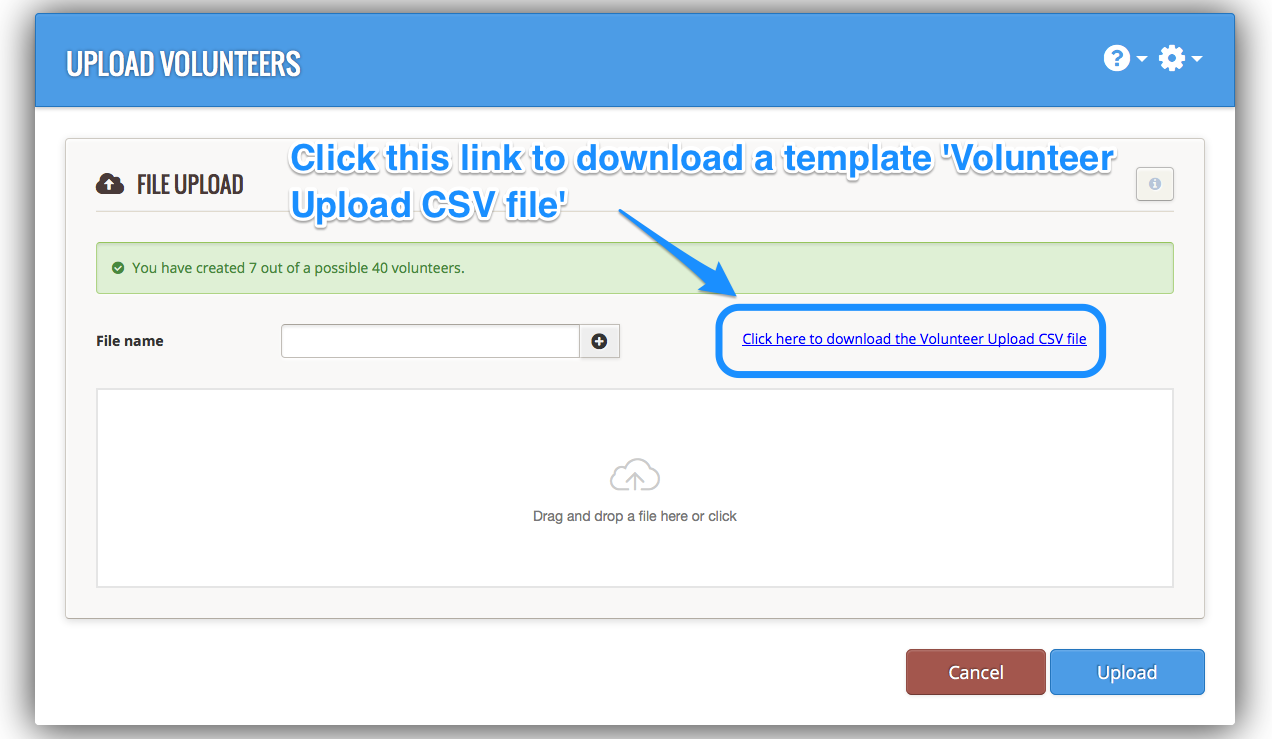
 Once you see the Upload Volunteers screen, click the link that says 'Click here to download the Volunteer Upload CSV file':
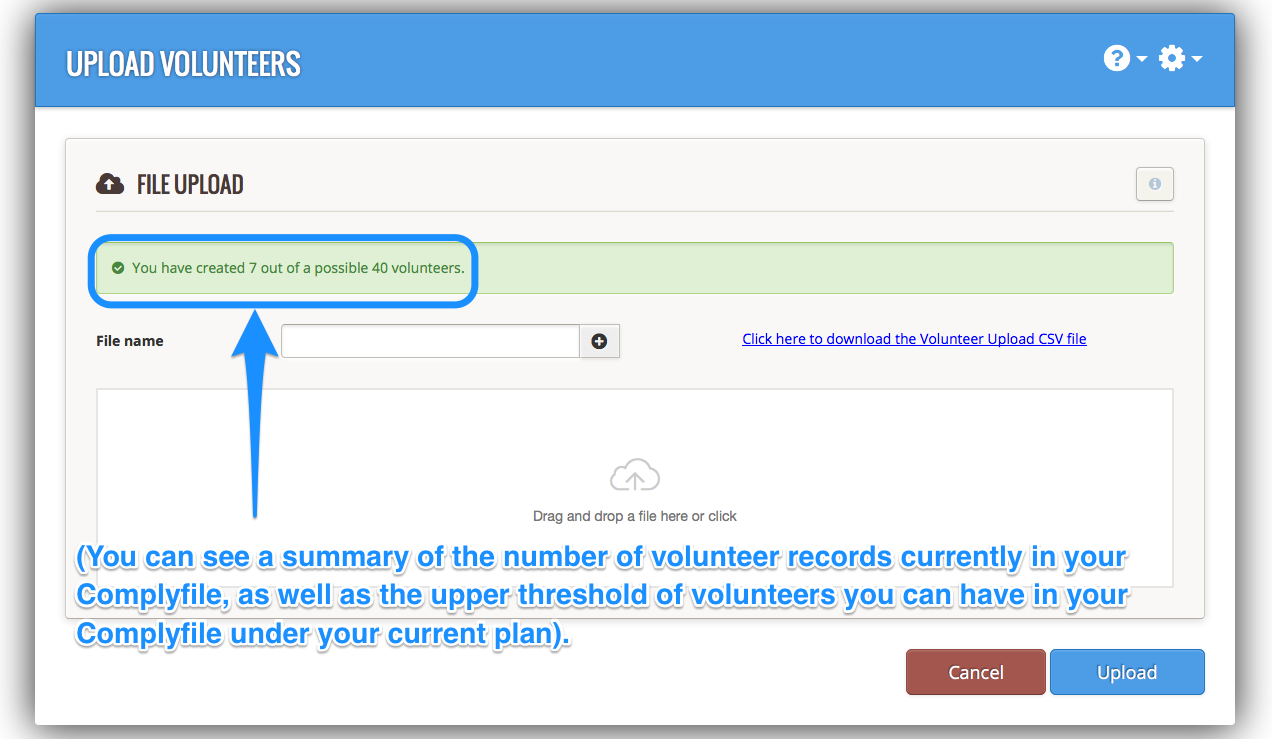
 (You can also see the number of volunteers currently in your Complyfile, and the upper threshold under your current plan. You can upload volunteers up to and including the upper threshold of your plan. Click here to see how to change your plan to increase the upper threshold of volunteers in your Complyfile):
 Open the file you just downloaded. You will find it in the Downloads section of your computer.
Populating your File with Data
- Once you have your template file, which should be empty of volunteer data, open the file in your worksheet editor of choice (e.g. Microsoft Excel, or an alternate)
- Populate this file with the details of the volunteers for whom you want to create records in your Complyfile
What information should go into the File for upload?
Pay careful attention to the column headings, making sure that you input the information accurately. You will be inputting into this file the names of existing volunteers who the branch has already recruited, but for whom you want to create a record in your Complyfile database, against which you can then in the future upload such existing paper documents/records that you currently have (e.g. training certs, vetting letters etc).
Format of Data Import
It is very important that the information ("data") that you type into the fields (the little boxes in the spreadsheet) should reflect the instructions in the column headers of your template spreadsheet.
Remember, the quality of your data import is tied to the quality of the data that you put into the spreadsheet. Complete it accurately, and you'll get accurate data imported. Complete it inaccurately, and you'll get inaccurate data imported.
Email Address Cannot be Changed Once Uploaded
Important: triple check that you use the correctly spelled (and current) email address for the person for whom you're creating a secure page within your Complyfile. Once imported, you cannot change this email address at a later date (your only option is to delete their profile page and create one afresh). The page is private and secure to the person for whom you're creating it, and accessible only by you (in your capacity as an organisation administrator) and them.

Widen the Column to see instructions
(When you open your file, you may need to increase the width of your columns, to see them displayed as above).
| Column A: | First Name | Mandatory | e.g. Jennifer |
| Column B | Surname | Mandatory | e.g. Smith |
| Column C | Mobile Number | Mandatory | can simply go in as either: 0862283213 or 862283213 (but no country code). It's fine for the zero to drop at the start. Do not leave a blank e.g. 086 228 1234 (with blanks inside the number). |
| Column D | Email Address | Mandatory | This must be their correctly spelled email and cannot be amended at a later stage, so please double check you have this right. |
| Column E | Date of Birth | Mandatory | Should read: 07/11/1967 (for 7th November 1967). If you are not sure of the person’s date of birth, simply type in a test date e.g. 01/01/1970 (which you can then update at a later date). If you type simply 01 01 2000 this will not be recognised. You need to have the / between the numbers. |
| Column F | Gender | Mandatory |
Type one of: Male or Female. If you have requested Complyfile enable the Custom Gender functionalty, type the relevant custom gender instead. |
| Column G | Address 1 | Mandatory | i.e. the first field in the address section |
| Column H | Address 2 | Mandatory | i.e. the second field in the address section |
| Column I | Address 3 | Mandatory | i.e. the third field in the address section |
| Column J | City/Town | Mandatory | For the City/Town, simply put e.g. Dublin, Kildare, Wicklow (not County Dublin, or Co. Kildare). For Dublin addresses, put Dublin instead of e.g. Dublin 18 |
| Column K | Postcode / Eircode | Optional | |
| Column L | County | Mandatory |
e.g. Dublin, Kildare, Wicklow (not County Dublin, or Co. Kildare). For Dublin addresses, put Dublin instead of e.g. Dublin 18. See list of Counties below: 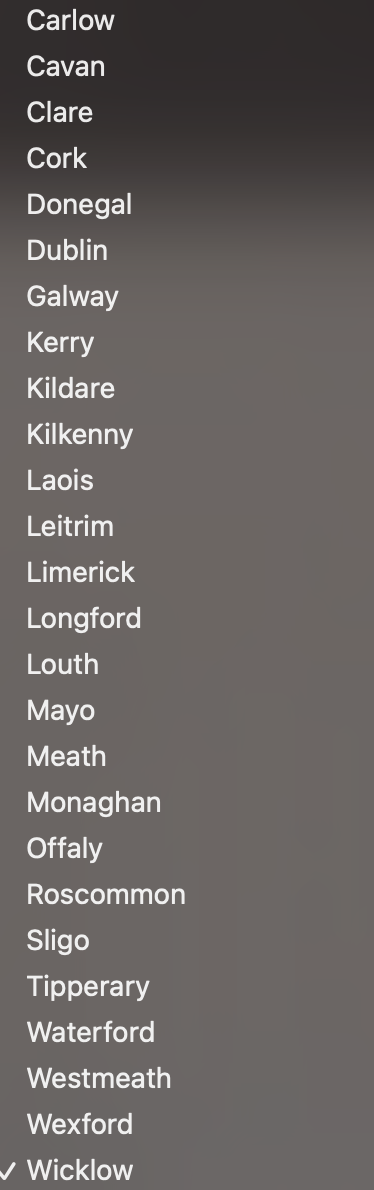 |
| Column M | Country | Mandatory | type Ireland (not Republic of Ireland) or Northern Ireland |
| Column N | Role | Optional | Type Volunteer |
| Column O | Start Date | Optional | You can leave this blank. If you know and want to record their Start Date, this should read: 07/11/2022 (for an example Start Date of 7th November 2022). If you are not sure of the person’s Start Date, you can leave it blank or simply type in a test date e.g. 01/01/1970 (which you can then update at a later date). If you type simply 07 11 2022 this will not be recognised. You need to have the / between the numbers. |
| Column P | Region | Optional | Only use if you've asked Complyfile to set up Regions for you. If you have, use the Region name exactly as in your list of Region. If not, leave blank. |
| Column Q | Location | Optional | Only use if you've asked Complyfile to set up Locations for you. If you have, use the location name exactly as in your list of Locations. If not, leave blank. |
| Column R | Status | Optional | If they are an Active volunteer already, type Active (recommended). If Inactive, type Inactive. |
Save as .csv file
Important: Save your file as a .csv file (you can do this by going to File > Save as > open Save as type drop-down > select CSV (comma delimited) (*.csv) > Give your file a name that you will understand (e.g. "Upload Current Volunteers File [today's date]").
Important: Save your file as a .csv file (you can do this by going to File > Save as > open Save as type drop-down > select CSV (comma delimited) (*.csv) > Give your file a name that you will understand (e.g. "Upload Current Volunteers File [today's date]").
Using the 'example' data above, this is what you would type into the spreadsheet for a volunteer who I'm calling Jennifer Smith:

Creating Multiple Records for Multiple Persons
Simply repeat the process as many times as you have persons for whom you want to create a profile page with your organisation's Complyfile.
Remember, for each person, start an entry on a new line in the file which you will be uploading. Do take your time here, as if you can get the data right at this stage, on your spreadsheet, it will save you time in the future making updates / amendments to any incorrect data inadvertently uploaded.

Next Steps - Importing the File
Once you've created the file that you want to import into your Complyfile, you'll need to import that file into your Complyfile.
Click here to learn how to import your CSV file into your Complyfile, to create new volunteer records (for your existing volunteers) in your Complyfile.